How to Flash the Game Image to an SD Card Using Rufus
Windows users - step-by-step guide
This guide explains how to write the game image file to an SD card using Rufus. Please read each step carefully before starting.
Note: Rufus is a Windows utility. If you are using a Mac, please use the BalenaEtcher version of this guide instead. |
Important: This procedure will completely erase the selected SD card. Always make sure you have selected the correct SD card before pressing START. |
Before You Start
- A Windows computer with an SD card reader.
- The SD card removed from the game.
- Rufus downloaded from the official Rufus website.
- The game image file downloaded and extracted from the provided ZIP file.
- Enough time to complete the process without disconnecting the SD card.
Rufus download page: https://rufus.ie
Game image download link: SD GAME CODE
1. Download Rufus
Go to the official Rufus website and download the latest Windows version. Rufus does not require a traditional installation: once downloaded, run the executable file directly.
Important: We recommend downloading Rufus only from the official website to avoid unofficial or modified versions. |
2. Download and Extract the Game Image
Download the game image from the provided Google Drive link. The file is provided as a ZIP archive. After downloading it, extract the ZIP file before using Rufus.
After extraction, the final image file should look similar to: an090126.img
Important: Do not select the ZIP file inside Rufus. Rufus must use the extracted .IMG file. |
3. Open Rufus and Select the Game Image
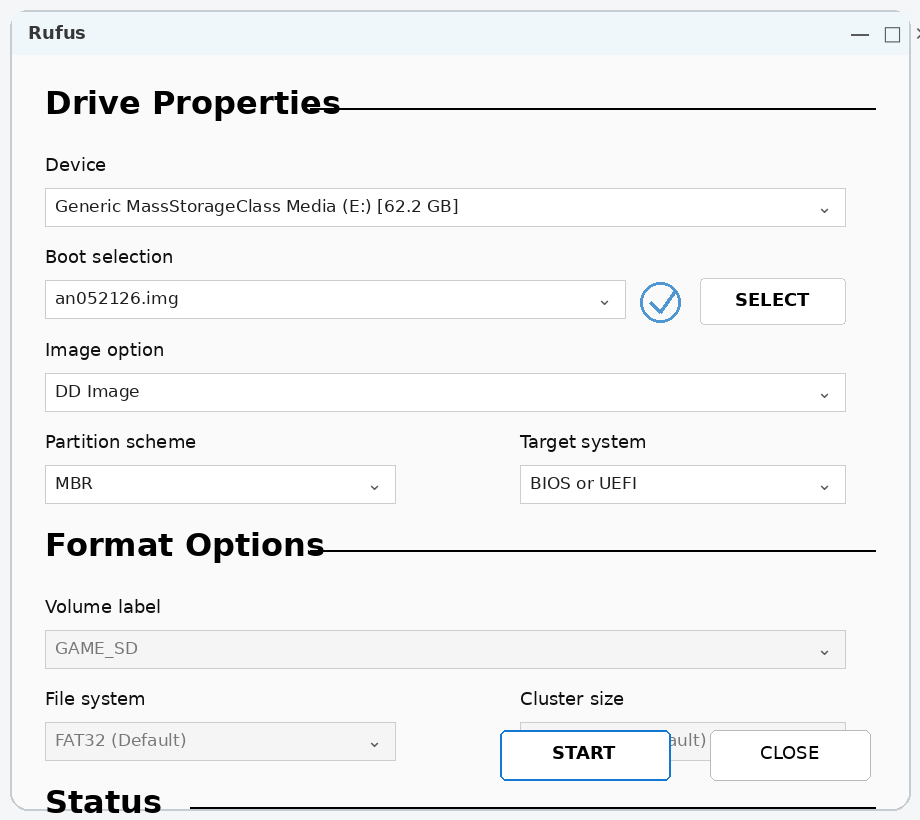
Open Rufus. In the Boot selection section, click SELECT and choose the extracted game image file, for example: an052126.img.

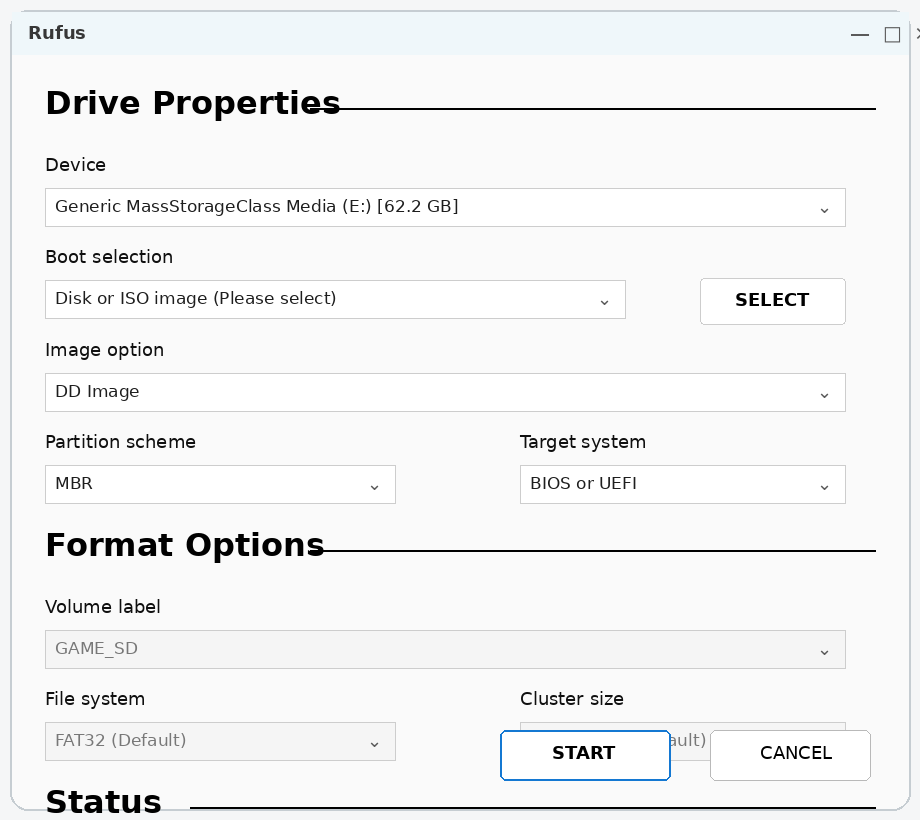
Example: Rufus before selecting the game image file.
4. Insert the SD Card and Select the Correct Device
Insert the SD card into your Windows computer. In the Device field at the top of Rufus, select the SD card that came from the game.
Important: Be extremely careful at this step. If you select the wrong drive, Rufus will erase that drive. If you are not sure which device is the SD card, disconnect other USB drives and check again. |

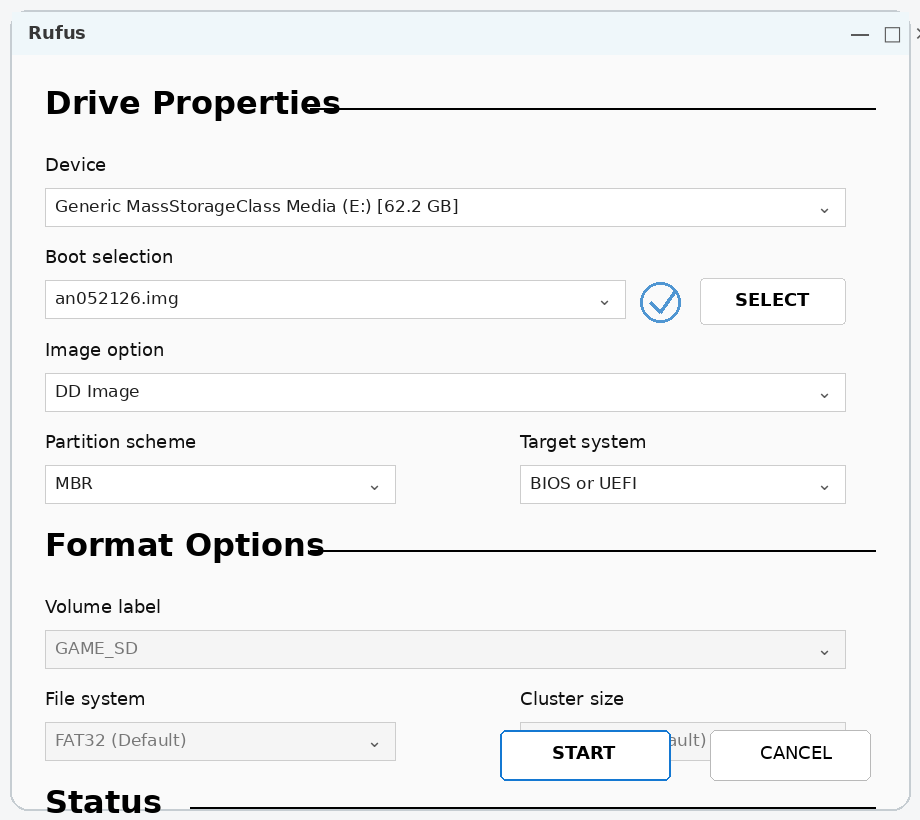
Example: game image selected and SD card selected as the target device.
5. Start the Flashing Process
Once the correct image file and SD card are selected, click START. Rufus may display a warning message confirming that all data on the selected SD card will be destroyed. Confirm only if the selected device is correct.

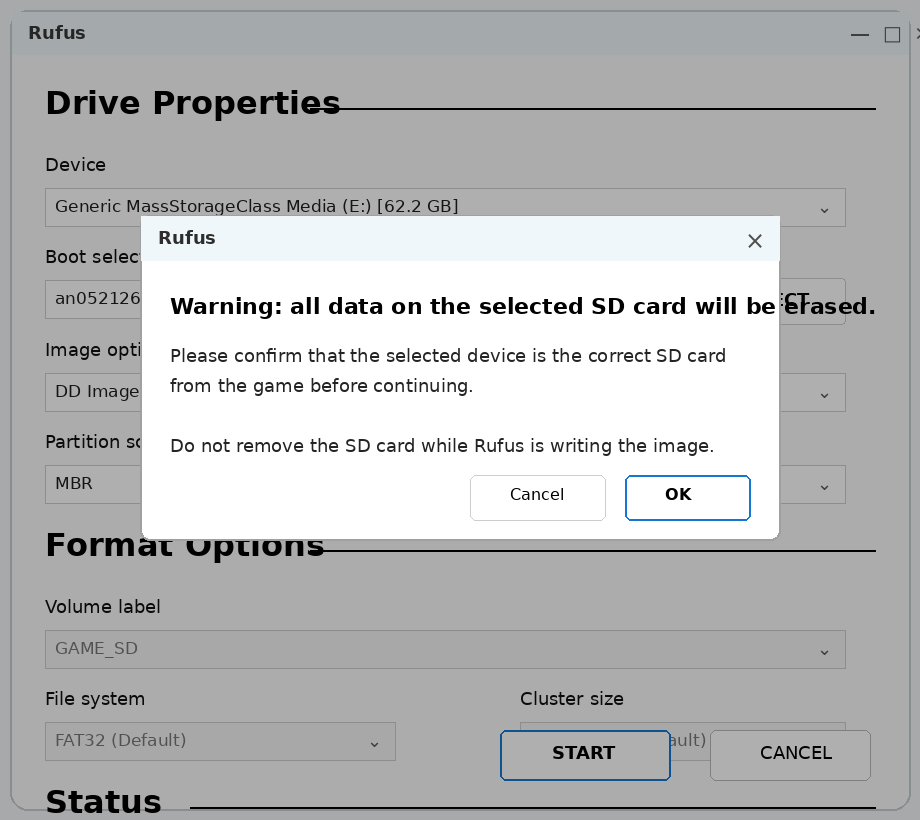
Example: confirmation warning before Rufus starts writing the image.
6. Wait Until Rufus Finishes
Rufus will now write the game image to the SD card. This may take several minutes depending on the speed of your computer and SD card.
Important: Do not close Rufus, remove the SD card, shut down the computer, or disconnect the card reader while the flashing process is running. |
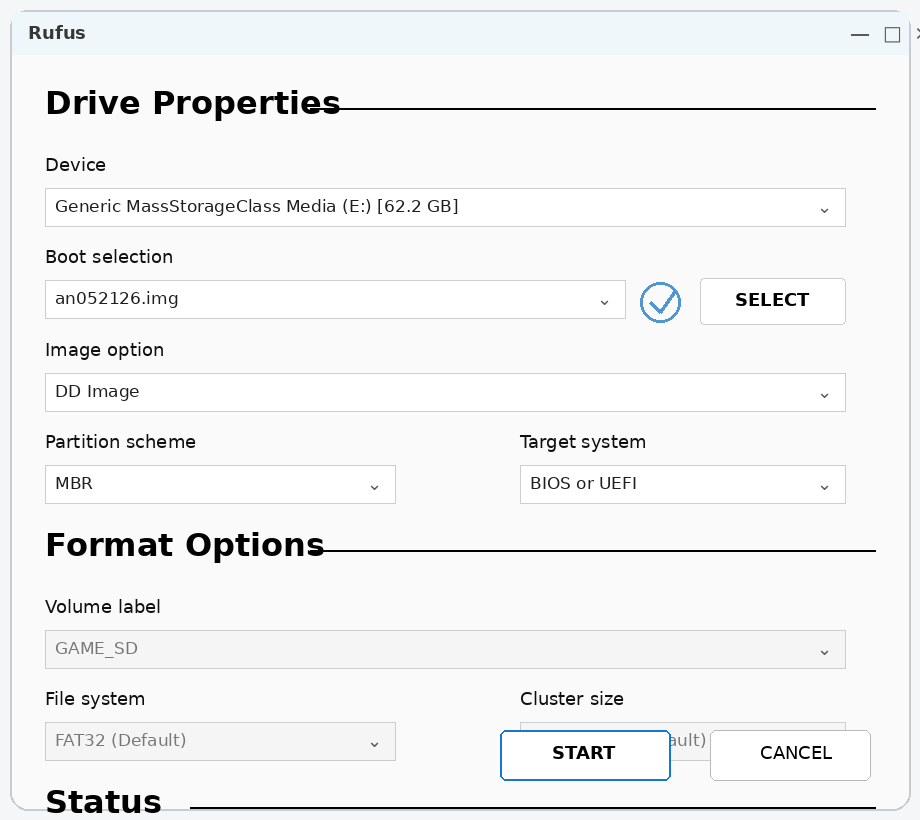
Example: Rufus writing the image to the selected SD card.
7. Remove the SD Card and Install It Back into the Game
When Rufus shows READY again, the process is complete. Close Rufus and safely eject the SD card from Windows before removing it from the computer.
Install the SD card back into the game, then power on the machine and allow it to boot normally.
Example: process completed. Rufus is ready and the SD card can be safely ejected.
Quick Troubleshooting
Issue | Suggested action |
Rufus does not show the SD card | Remove and reconnect the SD card or try another card reader / USB port. |
Rufus cannot find the image file | Make sure you extracted the ZIP file and selected the .IMG file, not the ZIP archive. |
Windows asks to format the card after flashing | Cancel the Windows format request. This can happen after writing special images and does not necessarily mean the process failed. |
The game does not boot after installing the SD card | Power the game off, re-seat the SD card, and try again. If the issue remains, re-flash the SD card carefully and verify that the correct image was used. |
Was this article helpful?
That’s Great!
Thank you for your feedback
Sorry! We couldn't be helpful
Thank you for your feedback
Feedback sent
We appreciate your effort and will try to fix the article